 Save
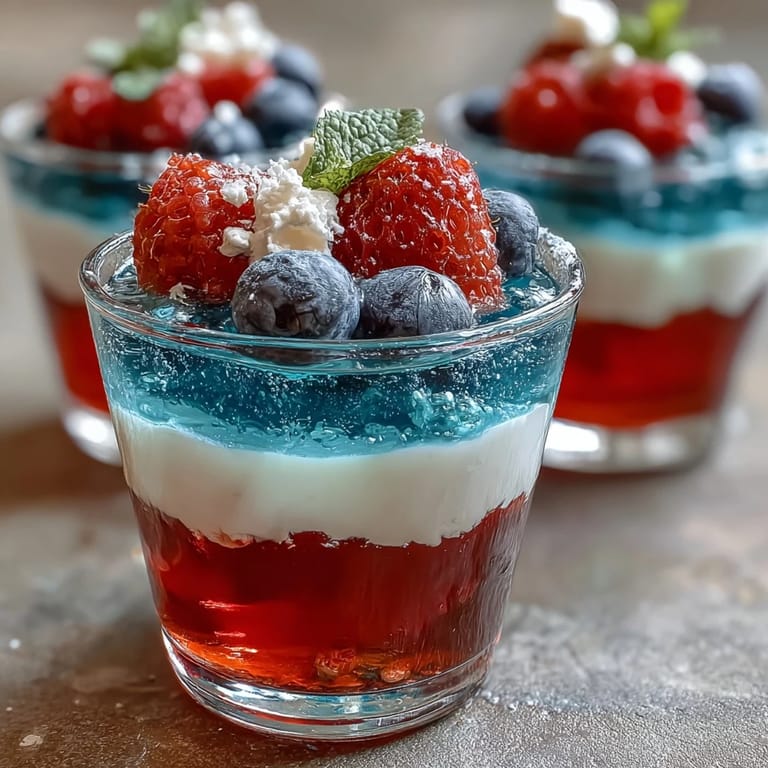
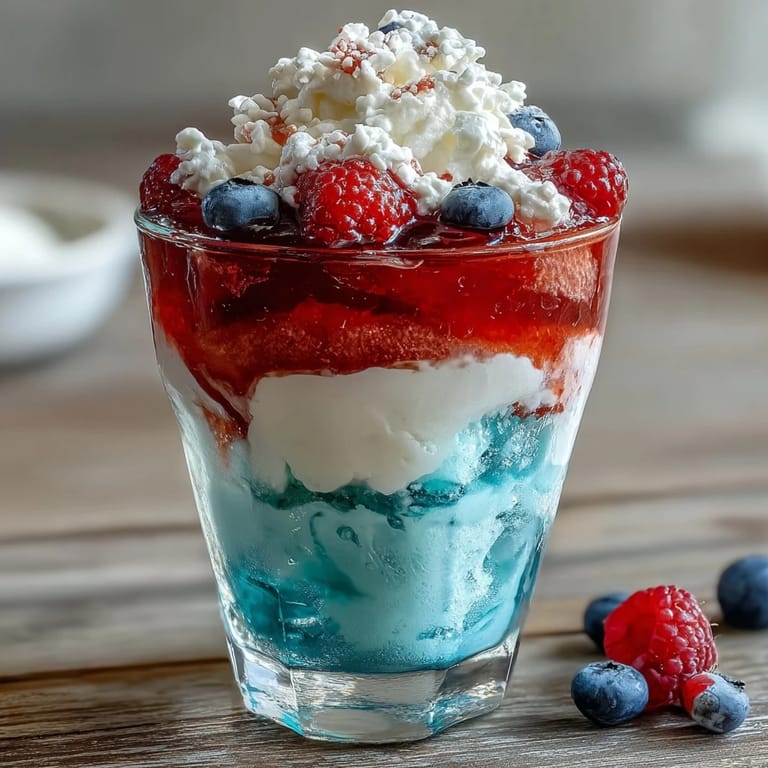
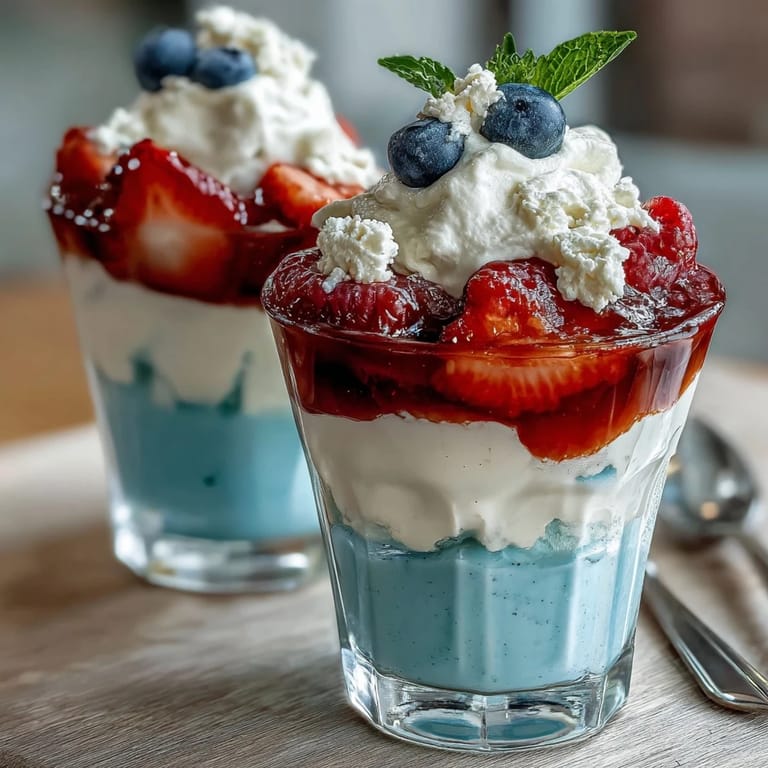
Save My daughter came home from school talking about a Fourth of July party at her friend's house, and I found myself standing in the kitchen wondering what to bring that would make her eyes light up. That's when these layered Jello cups appeared in my mind—I'd seen them years ago at a neighborhood potluck and never forgotten how they looked like edible fireworks. The vibrant stripes caught everyone's attention, but it was the simplicity of making them that sealed the deal. Now they're our go-to dessert whenever we need something that feels both special and manageable.
I'll never forget watching my nephew carefully carry one of these cups across the backyard, concentrating so hard on keeping it level that his tongue poked out slightly. He'd helped me layer them that morning, and when he took that first spoonful at the party, the way his face brightened made every minute of careful timing worthwhile. That's when I realized these aren't just pretty desserts—they're edible memories in the making.
Ingredients
- Strawberry or cherry flavored Jello (3 oz box): This is your bold opening act—don't skip the flavor choice just because it's easy, as the red should be vivid enough to shine through the layers.
- Boiling water for red layer (1 cup): The heat fully dissolves the gelatin so you get that glossy, even color with no grainy bits.
- Cold water for red layer (1/2 cup): This stops the cooking and brings the temperature down so you can work with it faster.
- Unflavored gelatin (1 envelope): This is the secret weapon for the white layer—it sets up creamy rather than bouncy, creating a beautiful contrast against the colored layers.
- Cold water for white layer (1/2 cup): Let it bloom in the gelatin for a full five minutes before adding heat; I learned this the hard way when I rushed and got lumps.
- Boiling water for white layer (1/2 cup): Just enough to fully dissolve the bloomed gelatin without overdiluting the creaminess.
- Sweetened condensed milk (1 cup): This transforms the white layer into something luxurious and opaque, making the stripes pop against each other.
- Blue raspberry flavored Jello (3 oz box): The final layer needs to be equally vibrant, so choose a brand with bold color that photographs well.
- Boiling water for blue layer (1 cup): Same principle as the red—dissolve completely for even color.
- Cold water for blue layer (1/2 cup): Brings the temperature down so it won't melt your white layer when poured.
- Whipped cream and fresh berries (optional garnish): If you go this route, add them just before serving so they stay perky and fresh.
Tired of Takeout? 🥡
Get 10 meals you can make faster than delivery arrives. Seriously.
One email. No spam. Unsubscribe anytime.
Instructions
- Gather your cups and set the stage:
- Arrange eight clear cups where they won't get jostled, and if you're using the muffin tin trick to angle them during the first chill, get that ready now. This takes two minutes but prevents the frantic searching later.
- Wake up the red layer:
- Pour the boiling water over the strawberry Jello and stir steadily for about a minute until every bit of powder dissolves—you'll see the water transform from dusty to jewel-toned. Add the cold water and stir once more, then divide it evenly among your cups, using about two tablespoons per cup.
- Angle and chill the red:
- Place the cups at an angle in a muffin tin or lean them against something stable in the fridge, then set a timer for 45 to 60 minutes. You want it set enough to hold a layer on top, but not rock-solid yet, which gives the next layer something to grip.
- Bloom and build the white layer:
- Sprinkle the unflavored gelatin over the cold water in a clean bowl and let it sit untouched for five minutes—this blooming step prevents lumps. Pour the boiling water over it and stir until completely dissolved and smooth, then add the sweetened condensed milk and stir until you have a pourable cream with no streaks.
- Cool the white mixture:
- Let this sit on the counter for 10 to 15 minutes, stirring occasionally, until it's cooled to room temperature and won't melt the red layer. A thermometer isn't necessary; just make sure it feels cool to the touch on the underside of the bowl.
- Set the red layer upright and add white:
- Once the red is set, stand the cups upright and carefully pour the white layer on top, using about two tablespoons per cup—pour slowly down the side of the cup if you're worried about breaking through. Return them to the fridge for another 45 to 60 minutes until the white is firm enough to support the blue.
- Prepare the blue finale:
- Dissolve the blue Jello in boiling water just like you did with the red, stir in the cold water, and let it cool to room temperature on the counter. This step matters because pouring warm gelatin over your white layer will weaken it, so patience here pays off.
- Crown with blue and finish setting:
- Pour the blue layer gently on top of the white, about two tablespoons per cup, and refrigerate upright for at least two hours, or overnight if you're making them ahead. The longer chill ensures all three layers are completely set and won't separate when you eat them.
- Garnish and serve:
- Just before serving, top each cup with a dollop of whipped cream and a scatter of fresh blueberries and strawberries if you like. These are best eaten within a day or two, as the layers can start to soften and blur together the longer they sit.
 Save
Save There's something almost meditative about watching these cups sit in the darkness of the refrigerator, the layers slowly setting into place without your help. It reminds me that not everything in cooking requires constant attention, and sometimes the best results come from stepping back and letting time do the work. These cups taught me that patience isn't just a virtue in the kitchen—it's what separates a good dessert from one that makes people remember the meal.
The Angled Chilling Trick
The muffin tin trick for tilting your cups during the first chill isn't just for show—it actually helps the red layer set evenly and prevents it from sliding down once you add the white layer on top. I tried stacking them upright once and ended up with a slanted red layer that looked like my refrigerator was tilted. The angle gives you a larger surface area for the white layer to settle on, so the stripes stay crisp and defined rather than melting into each other.
Flavor Swaps That Still Work
While the red, white, and blue combination is undeniably patriotic, the beauty of this recipe is how flexible it is with flavors. I've made green, white, and purple versions using lime and grape Jello, and my cousin once did orange, white, and cherry for a sunset theme. The white layer stays the same every time, which means your only variables are the two colored Jello boxes, so you can get creative without relearning the whole technique.
Making It Ahead and Storage
These cups are actually better when you make them a day or two in advance because the layers have time to fully set and the flavors mellow slightly. I usually assemble them the day before a party, cover them loosely with plastic wrap, and keep them in the fridge until serving time. They'll keep for about three days before the layers start to soften and blur together, so plan accordingly if you're making them for an event further out.
- Cover the cups loosely with plastic wrap once the blue layer is fully set so they don't pick up fridge smells.
- If you're transporting them, place the cups in a sturdy container and keep them on a flat surface away from anything that might jostle them.
- Serve them straight from the fridge for the best texture and appearance—they soften and become less pretty if left out at room temperature.
 Save
Save Every time I watch someone spoon into one of these cups and see their face light up at the color coordination, I'm reminded why I love cooking desserts. They're edible art that tastes sweet and feels celebratory without requiring pastry skills or a steady hand.
Recipe FAQs
- → How do I get clean, distinct layers?
Allow each gelatin layer to fully set before pouring the next. Chilling at a slight angle for the first layer helps create sharp lines.
- → Can I substitute the condensed milk in the white layer?
Yes, for dairy-free options, use coconut milk combined with sugar instead of sweetened condensed milk.
- → What are the ideal cups to use?
Clear 6–8 oz cups work best to showcase the layers, and a muffin tin can hold them angled during chilling.
- → How long should the dessert chill before serving?
Each layer requires about 45–60 minutes to set, with the final blue layer chilling at least 2 hours for best texture.
- → Can I change the gelatin flavors?
Yes, berry flavors can be swapped to personalize colors and taste while maintaining the layered effect.