 Save
Save The kitchen smelled like butter and sugar when my neighbor peeked through the screen door, curious about the bright pink dough sitting on my counter. I was testing a new cookie idea, something cheerful to shake off a gray week in February. She laughed when I told her they were pink velvet cookies, not because the name was silly, but because the dough looked like playdough we used to share as kids. That batch turned out perfectly: soft centers, crisp edges, and little pockets of melted white chocolate that made every bite feel like a small celebration.
I brought a tin of these to a baby shower once, not realizing how much the color would steal the show. Everyone assumed I had ordered them from a bakery, and I didnt correct them until someone asked for the recipe. The host later told me she kept the tin on her kitchen counter for weeks just to remember that afternoon. Its funny how a batch of cookies can become a tiny landmark in someones memory.
Ingredients
- All-purpose flour: The backbone of the dough, providing structure without making the cookies stiff or cakey.
- Baking powder and baking soda: This duo gives the cookies a gentle lift and that signature chewy texture in the center.
- Salt: Just enough to balance the sweetness and make the white chocolate taste richer.
- Unsalted butter: Softened to room temperature so it creams smoothly with the sugar, creating a light, fluffy base.
- Granulated sugar: Sweetens the dough and helps create those slightly crisp edges everyone fights over.
- Egg: Binds everything together and adds a little moisture for that soft, tender crumb.
- Vanilla extract: A warm, familiar flavor that rounds out the sweetness without overpowering the white chocolate.
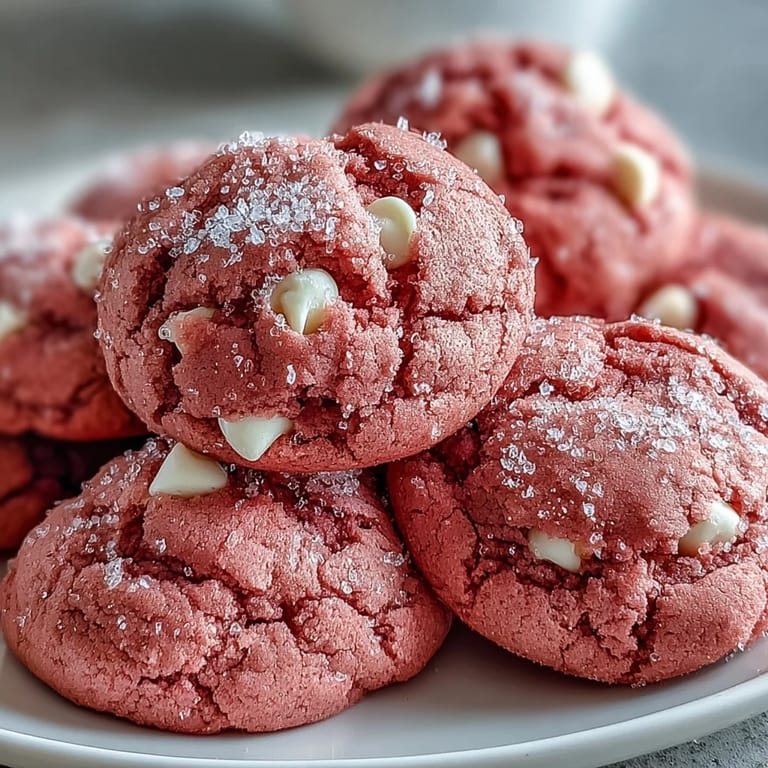
- Pink gel food coloring: The secret to that vibrant hue, gel works better than liquid because it wont thin out your dough.
- White chocolate chips: They melt into creamy pockets throughout the cookies, adding sweetness and a hint of vanilla.
Tired of Takeout? 🥡
Get 10 meals you can make faster than delivery arrives. Seriously.
One email. No spam. Unsubscribe anytime.
Instructions
- Mix the dry ingredients:
- Whisk the flour, baking powder, baking soda, and salt in a medium bowl until evenly combined. Set it aside while you work on the wet ingredients.
- Cream the butter and sugar:
- Beat the softened butter and sugar together until the mixture turns pale and fluffy, about two to three minutes. This step is what makes the cookies light and tender.
- Add the egg and flavorings:
- Beat in the egg and vanilla extract until smooth, then add the pink gel food coloring. Mix until the dough is evenly tinted and no streaks remain.
- Combine wet and dry:
- Gradually add the flour mixture to the wet ingredients, mixing on low speed just until the dough comes together. Overmixing will make the cookies tough, so stop as soon as you dont see any dry flour.
- Fold in the white chocolate:
- Use a spatula to gently fold in the white chocolate chips, making sure theyre evenly distributed throughout the dough.
- Chill the dough:
- Cover the bowl with plastic wrap and refrigerate for 30 minutes. This step helps the cookies hold their shape and prevents them from spreading too thin in the oven.
- Preheat and prep:
- While the dough chills, preheat your oven to 350 degrees Fahrenheit and line two baking sheets with parchment paper.
- Shape the cookies:
- Scoop tablespoon-sized balls of dough and place them two inches apart on the prepared baking sheets. Leave enough space because theyll spread a little as they bake.
- Bake until just set:
- Bake for 10 to 12 minutes, until the edges are set but the centers still look soft. They might seem underbaked, but theyll firm up as they cool.
- Cool completely:
- Let the cookies cool on the baking sheets for five minutes, then transfer them to a wire rack. They need to cool completely before you stack or store them.
 Save
Save One afternoon I made these with my niece, who was convinced pink cookies tasted different than regular ones. She took her job seriously, carefully counting white chocolate chips into each scoop of dough like they were tiny treasures. When the cookies came out of the oven, she announced they tasted like happiness, which is probably the best review Ive ever gotten.
Storing and Freezing
These cookies stay soft in an airtight container for up to a week, though they rarely last that long in my house. If you want to freeze the dough, scoop it into balls and freeze them on a baking sheet, then transfer to a freezer bag once solid. You can bake them straight from frozen, just add a minute or two to the baking time.
Flavor Variations
I once added a half teaspoon of almond extract to the dough and the cookies tasted like a fancy bakery treat. A few drops of rose water also work beautifully if you want something a little more floral and unexpected. You can even swap the white chocolate for dark chocolate chips if you want a richer, less sweet bite.
Serving Suggestions
These cookies are perfect on their own with a glass of cold milk, but Ive also sandwiched them with cream cheese frosting for birthdays and they disappeared in minutes. Press a few extra white chocolate chips on top before baking if you want them to look extra pretty for a party.
- Serve them warm with a scoop of vanilla ice cream for an easy dessert that feels indulgent.
- Pack them in a tin with parchment paper between layers to keep them soft for gifting.
- Set out a plate at brunch or a picnic, theyre bright and cheerful enough to lift any gathering.
 Save
Save Every time I make these, someone asks for the recipe, and I love that they look impressive but feel easy. Theyre the kind of cookies that make people smile before they even take a bite.
Recipe FAQs
- → What makes these cookies pink?
Pink gel food coloring provides the vibrant hue. Gel coloring delivers more intense color than liquid alternatives, so you need less to achieve the desired shade without affecting the dough consistency.
- → Can I use liquid food coloring instead?
Liquid food coloring works but may require larger amounts, which can slightly alter the dough's moisture. Gel coloring is recommended for the most vibrant results without impacting texture.
- → Why is chilling the dough necessary?
Chilling for 30 minutes firms the butter, preventing excessive spreading during baking. This step ensures thicker cookies with soft centers and crisp edges rather than flat, thin discs.
- → How should I store these cookies?
Keep in an airtight container at room temperature for up to one week. For longer storage, freeze unbaked dough balls for up to three months and bake fresh when needed.
- → Can I make these gluten-free?
Substitute all-purpose flour with a 1:1 gluten-free baking blend. Most commercial blends work well, though texture may vary slightly depending on the brand.
- → What pairs well with these cookies?
These pair beautifully with vanilla ice cream for sandwiches, or alongside coffee and hot chocolate. The subtle vanilla flavor makes them versatile enough for various dessert combinations.