 Save
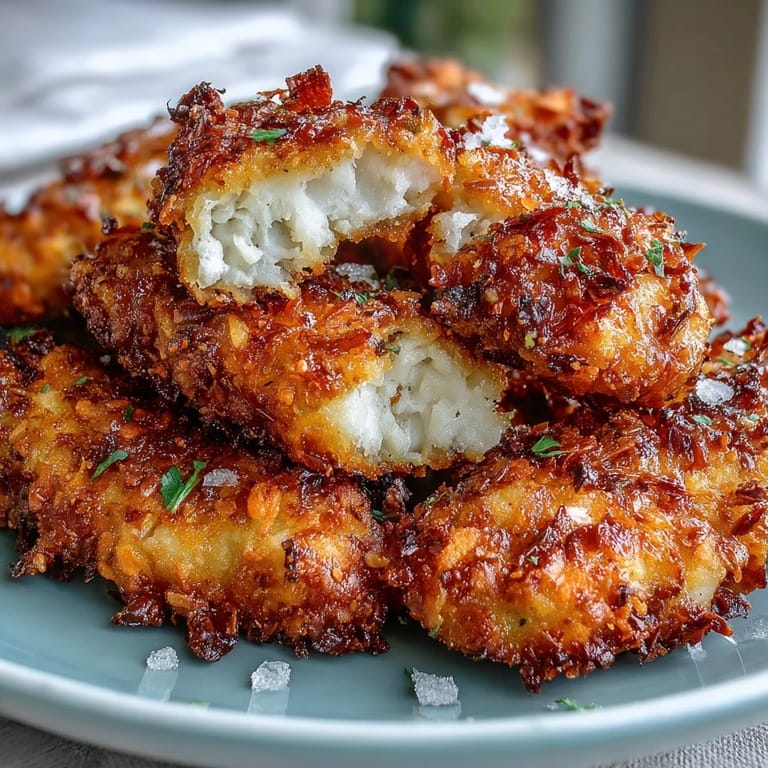
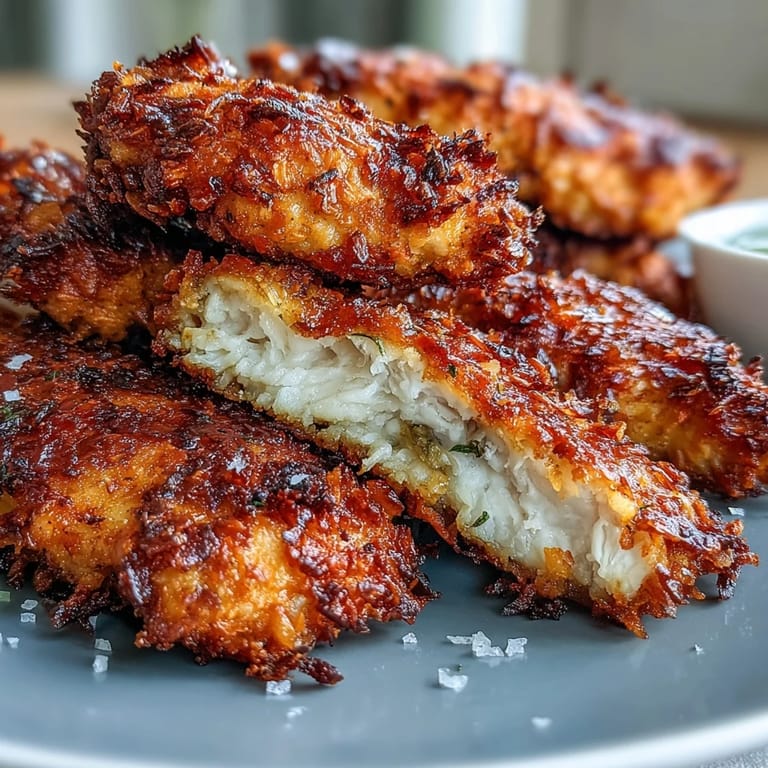
Save The prospect of using leftover pickle brine for anything other than tossing it down the drain seemed far-fetched—until a rainy afternoon begged for some creative kitchen magic. The familiar scent of dill and garlic rising up from an emptying jar got me thinking about giving plain chicken tenders a bold tangy twist. Testing it out, I found that a good soak in that brine transforms humble strips into something addictively juicy. If you've ever wondered what else pickle juice can do besides flavor sandwiches, this crispy, golden chicken is the happy answer. Crunch that rivals fried chicken joints and a pop of flavor no store-bought tender can touch.
One chilly weekend, I made these for a movie marathon with friends, and the kitchen erupted into a symphony of grease-popping and laughter over who could dip fastest. No one cared what was on screen once the basket of tenders landed on the coffee table with little ramekins of spicy mayo and ranch. Crunching into the first bite, a friend joked she’d never look at leftover pickle jars the same way. That’s a kitchen memory sealed as tightly as any lid.
Ingredients
- Chicken tenders: They cook evenly and are perfectly sized for snacking; if using breasts, slicing them thin makes a difference.
- Dill pickle brine: Its acidity breaks down the chicken fibers, resulting in juicy meat—save the good garlicky stuff from your favorite pickles.
- Hot sauce: Just a splash adds depth without making it overly spicy, though you can skip or increase as you like.
- All-purpose flour: The base of your crust, giving that light yet sturdy crunch when fried.
- Cornstarch: Makes the coating extra crispy, learned after a few too many soggy batches.
- Paprika, garlic powder, onion powder: These add smoky warmth and savory notes to bring out the best in the chicken.
- Kosher salt & black pepper: Seasonings you can trust to bring out flavor—just don’t skimp.
- Cayenne pepper: For those who want a subtle kick, but it can be left out for milder palates.
- Eggs & buttermilk: They create a sticky layer that helps the breading adhere and brown beautifully; non-dairy milk replaces buttermilk seamlessly.
- Vegetable oil: Frying in enough oil ensures maximum crunch—you want at least two inches for a proper fry.
Tired of Takeout? 🥡
Get 10 meals you can make faster than delivery arrives. Seriously.
One email. No spam. Unsubscribe anytime.
Instructions
- Marinate the chicken:
- Tumble the chicken tenders into a bowl with pickle brine and a dash of hot sauce, swirling until coated. Cover and let the flavors meld in the fridge for at least an hour.
- Prep the coating:
- After marinating, pat each tender dry with paper towels so the breading will stick. In a wide shallow dish, whisk together the flour, cornstarch, paprika, garlic powder, onion powder, salt, black pepper, and a pinch of cayenne.
- Mix your dredging liquids:
- In a separate bowl, whisk the eggs and buttermilk until smooth and lightly frothy.
- Bread the tenders:
- Dip each chicken piece in the flour mixture, then into the egg mixture, then back into the flour—pressing well on the last go-round for good measure.
- Heat the oil:
- Pour two inches of oil into a sturdy skillet or Dutch oven, bringing the temperature to 350°F. Listen for the gentle sizzle when you test a small bit of coating—it means you’re ready to fry.
- Fry the tenders:
- Lower in a few tenders at a time, cooking until deeply golden (about 3–4 minutes per side), flipping carefully so the coating stays intact. Remove and rest them on a rack or paper towels to crisp up further.
- Serve hot:
- Slide onto a plate and bring out your favorite sauces—these disappear fast, so don’t dally.
 Save
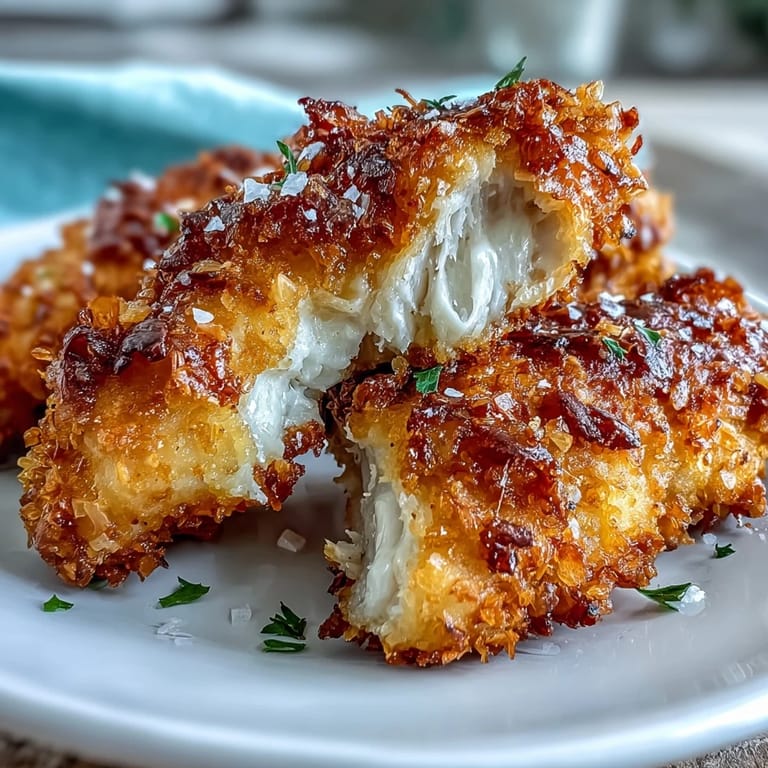
Save Watching someone’s eyes light up after that first bite, with a crunch so loud it drowns out kitchen chatter, is when I realized I’d never make plain old chicken tenders again. Suddenly, even an ordinary night felt like a special occasion with a basket of these on the table.
How to Make Them Dairy Free or Even Crispier
Out of buttermilk No worries—your favorite unsweetened non-dairy milk works just as well for the egg wash. For even more crunch, sometimes I toss in half a cup of panko to the flour coating, a trick I stumbled on after running low on flour one busy evening.
Sauces to Try and What Goes Best
This chicken is a natural match for all sorts of dips: classic ranch, spicy mayo, or even a good drizzle of hot honey. If you happen to have bread-and-butter pickle brine instead of dill, it’ll make the chicken just a hint sweeter.
Troubleshooting: Soggy Breadings and Splattery Frying
If your coating gets soggy, it’s usually a case of oil not being hot enough or crowding the pan, so give each piece some space. I learned that a wire rack is your best friend for keeping the crust crisp as the tenders cool.
- Always preheat the oil and test with a flick of flour before frying.
- Don’t fry too many at once or the temperature will drop.
- Let your chicken rest briefly on a rack for the crispiest result.
 Save
Save Whenever you use that forgotten jar of pickle brine, you’ll turn an everyday dinner into something worth gathering for. I hope these crispy chicken tenders bring a little extra crunch and joy to your table, just like they do at mine.
Recipe FAQs
- → How long should I marinate the chicken?
Marinate 1–4 hours for good flavor and tenderizing. One hour is enough to impart tang without over-salting; avoid overnight so the meat doesn't become too salty or soft.
- → What creates the extra-crispy coating?
A mix of all-purpose flour and cornstarch plus a double-dredge (flour, egg wash, flour) yields a thick, crunchy crust. Pressing the coating firmly and frying at the right temperature locks in crispness; adding panko boosts crunch further.
- → Can I bake these instead of frying?
Yes. Arrange tenders on an oiled rack over a baking sheet and bake at 425°F for 18–20 minutes, flipping halfway. The rack lets air circulate for a crisper exterior, though frying will produce the crispiest result.
- → What oil and temperature work best for frying?
Use a neutral oil with a high smoke point, such as vegetable or peanut oil. Heat about 2 inches of oil to roughly 350°F (175°C) and fry in batches until golden, about 3–4 minutes per side, to ensure even cooking.
- → How can I make a dairy-free option?
Substitute non-dairy milk (such as unsweetened almond or oat milk) for buttermilk in the egg wash, or use a mixture of non-dairy milk and a splash of vinegar for tang. The breading and frying method stays the same.
- → What dipping sauces pair well with these tenders?
Classic choices include ranch, honey mustard, and spicy mayo. For a sweeter contrast try honey or bread-and-butter pickle–based sauces; for heat, mix sriracha with mayo or serve with a vinegar-based hot sauce.